
A rotten window not only spoils the appearance but also reduces the building’s energy efficiency, contributes to a worsening indoor climate, and can result in additional repair costs. Replacing damaged elements requires precision and knowledge of the key work steps to ensure the durability and safety of the structure.
If you want to save time and effort, ordering repairs from professionals at FixHomeGlass is a convenient solution. However, with the right skills and tools, you can replace a window yourself by following the proven ideas and practical tips presented in this article.

Tools and Materials for Replacing a Damaged Window Unit
Before beginning work on replacing a rotten window unit, it’s important to prepare all the necessary tools and materials. This will ensure a quick and high-quality result and reduce the risk of problems during the installation of the new window.
Essential replacement tools include a power or manual screwdriver, a hammer, a hacksaw or wood saw, a level for checking horizontal and vertical alignment, and a special putty knife or shovel for removing old window frames and seals. Be sure to wear protective gloves and goggles to ensure safety during the work.
Materials Required for Window Unit Replacement
- A new window unit is selected based on the opening dimensions and thermal insulation requirements.
- Sealants – to ensure a tight seal and sound insulation.
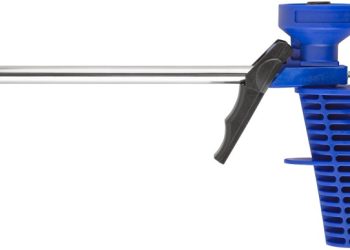
- Polyurethane foam – to secure and insulate the structure.
- Sealant – to seal seams and prevent moisture ingress.
- Anchor bolts, dowels, and screws – to secure the window in the opening.
- Waterproofing material – to protect the window and opening from moisture and condensation.
Choosing Tools and Materials
When choosing tools, choose high-quality products that will ensure durability and precision. For materials, it is important to consider window parameters, such as size, type of glass unit, and installation features. It’s also important to select the right sealants and insulation to ensure maximum thermal insulation and long-lasting installation.
Preparing the Window and Surrounding Surface for Dismantling
Before dismantling a rotten or damaged window, it’s important to properly prepare the work area and the window itself to ensure safety and efficiency. To do this, remove all objects and furniture near the window to avoid damage and ensure easy access to the work area.
Also, thoroughly clean the surrounding area of dirt, dust, and old wallpaper or finishing materials. Remove old seals, adhesive, and dust from the frame and adjacent surfaces to ensure good adhesion of the new materials and avoid damage during dismantling.
Preparatory Measures Before Window Removal
- Ensure the window is securely fastened: install temporary supports or reinforce the frame to prevent it from collapsing during dismantling.
- Turn off the heat and water supply if it comes through the window openings: this will reduce the risk of damage and leaks.
- Inspect the surrounding area: if necessary, prepare the surface for subsequent treatment or insulation.
- Protect the work area: cover the floor and adjacent surfaces with a thick cloth or plastic film to reduce dust and debris.
- Have professional or independent helpers: if necessary, assemble and dismantle heavy window structures.
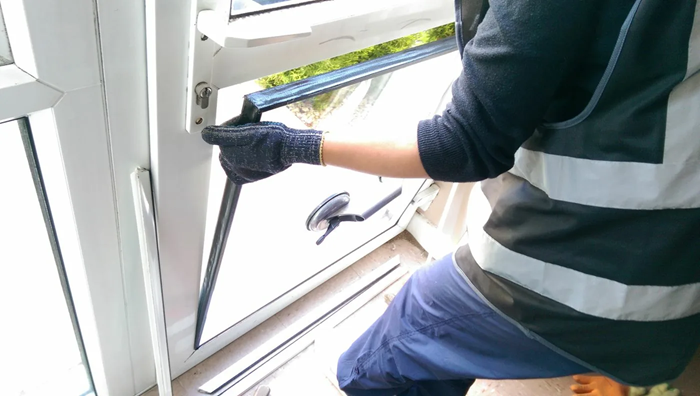
How to Carefully Remove an Old Window Without Damaging the Frame
Before starting the process, make sure you have everything Necessary tools and safety equipment. Carefully removing an old window requires patience and attention to detail to avoid damaging the frame and surrounding structures.
Follow the step-by-step instructions to complete the job safely and efficiently.
Basic Steps for Removing an Old Window
- Preparation: Clear the area around the window, remove any window blinds, handles, and other accessories. Protect the floor and furniture under the window with film or fabric.
- Loosening: Carefully remove the trim and decorative trim using a putty knife or screwdriver. Check for any foam or sealant and carefully remove it.
- Removing the Frames: If necessary, carefully trim or loosen the frame to free the window. Avoid damaging the wall or walls.
- Removal: Secure the window on both sides and slowly and evenly remove it. Ask for an assistant if necessary.
- Finishing: After removing the old window, inspect the frame for damage and prepare it for the new installation.
Carefully removing the old window is an important step in preparing for replacement. By following the correct sequence and taking precautions, you minimize the risk of damage to the frame and surrounding structures. Patience and attention to detail will ensure a successful outcome and a long life for your new window.


